Farm Livestock and Poultry Basics
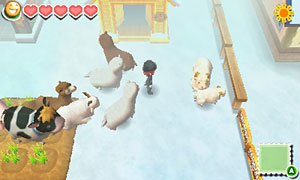
Another way to make income from your farm is by shipping products from your livestock and poultry animals. After you go through your initial training with Eda, she'll give you one of her cows, Hanako. You will also receive a variety of tools to care for Hanako such as an Old Milker and Old Brush. Other old-quality tools can be purchased from Otmar's General Store, and blueprints used to upgrade tool quality can be purchased from the vendors at the Trade Depot.
Additional animals can be purchased from the Trade Depot vendors, specifically Silk Country, Cabin Country, and Wheat Country. Animals will become available as you proceed through the years in the game; you cannot force a vendor to sell a specific animal until you've met the minimum year requirements. The last farm animal unlocks in Spring of year 4.
Your starter barn can only hold 8 livestock animals. You can construct additional barns using blueprints you buy from the depot merchants. There is a maximum of 2 barns per side of your farm, for a grand total of 32 spaces to hold livestock animals. There's no animal bonus effect for housing animals in a specific style of barn.
The farm Veronica assigns you does not come with a poultry Coop, but the blueprint is for sale at Silk Country. Each Coop can house up to 8 chickens. The Angora Rabbits also count in that total, with a maximum of 2 Angora Rabbits per Coop (generally, 6 chickens and 2 Angora Rabbits). Again there is a maximum of 2 Coops per side, with a total of 32 Coop animals for all your farm space.
Animal Statistics and Friendship
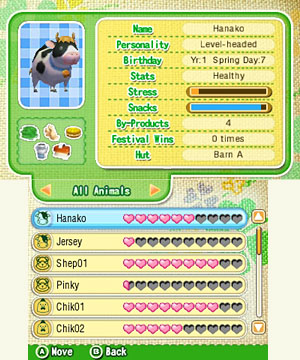
You can see how well your animals are doing by checking the Notebook located in the lower-left corner inside each barn or coop. Press the A Button while next to the Notebook and select View Information to see the facts about your animal friends. The Left Shoulder and Right Shoulder buttons will shift you through each category of animals that you own.
The bottom screen on your Nintendo 3DS will display your animals' friendship levels. The greater the number of animals friendship hearts, the higher Star Rank of goods they will produce for you. Higher Star Rank items will sell for more money. Each filled-in heart is worth 100 Friendship Points, with a maximum of 1000 FP.
Raising your animals' friendship levels can be done by simply taking good care of your animals. Cleaning, petting, feeding, and spending time outside their barns will add points to their heart markers. The different species of animals will raise friendship at different rates:
- Talking (A Button) to an animal once per day: +1 for most; +2 for Angora Goat, rabbits, Zebu
- Brushing an animal once per day, except for chickens: +2 for most; +3 for rabbits, Suffolk, Zebu; +4 for Sheep
- Feeding a normal Treat: +1 for most; +2 for Angora Goat, rabbits, Zebu
- Feeding a special Treat (Moo, Baa, Cluck, Flipsy): +2 for most; +3 for Angora Goat, rabbits
- Collecting an animal's products: +1 for most; +2 for alpacas, Suffolk, Zebu; +3 for Angora Goat; +4 for Sheep
- Grazing on your farm on a sunny/snowy day for each 1 full hour: +1 for Araucana, Camel, Jersey, Silkie, Suffolk; +2 for alpacas, Chicken, Cow, Sheep; +3 for Llama, Zebu; +4 for Angora Goat, rabbits
- Grazing in the Safari on a sunny day for each 1 full hour: +1 for most; +2 for Angora Goat, rabbits, Zebu
Your biggest boost to an animal's friendship is when you participate in a festival with that animal. Winning first place in an animal festival will increase your FP by +30. Second place is +20, and third place is +10. You'll also earn +20 FP if you have the adult animal give birth or hatch a baby animal, though the Camel, Angora Goat, rabbits, and Zebu cannot breed.
You can also decrease your animals' friendship levels by doing unhealthy or irresponsible things to them. Some are small hits such as giving the wrong type of special treat to an animal (e.g., giving a Moo-Moo Treat to a Chicken) or not interacting with the animal for more than 2 days in a row. Some are more severe, like hitting your animals with your farm tools, leaving them outside for a full hour on rainy or stormy days, or forgetting to feed them. You'll receiving a bigger hit if you leave your animals outside overnight or an animal becomes so stressed that it becomes a Runaway. Your biggest negative impact will be if you let an animal on your farm die of sickness, as it affects the friendship (and trust) of all your remaining animals between -20 and -40 FP.
When cleaning your animals with the Brush, the animal won't be completely clean until you have used the Brush enough times that the animal sparkles. Just using the Brush once and then walking away may not be enough to clean its coat. You need to stand there, pressing down on the A Button while having the brush equipped as a tool, until you see your animal sparkle. If you are brushing your animals daily and they still seem to be stressed, it is probably because of this little got'cha you might not be expecting in this version of the game.
Runaway Animals
The orange-colored bar on your animal's Notebook profile is its stress meter. As you continue to neglect your animals, this 100-point bar will increase in length. It isn't healthy for an animal to have stress on its stress meter, but nothing terrible will happen until the bar is at least 50% filled. Once the stress points have reached 50 or more, there is a chance the animal will either become sick or it will run away. The higher the stress points, the greater the chance of this happening.
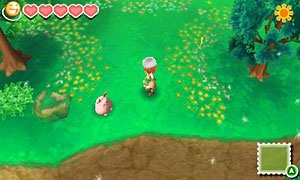
An animal that has run away will no longer be found in its barn. You'll wake up in the morning and *poof* you won't be able to find it anywhere on your farm! It isn't permanently gone yet. You can hunt down your distressed animal by looking in the Forest Path or Piedmont areas; you won't find it hiding in the public field areas or in Oak Tree Town. Once you locate your upset friend, you can either "Ask it to come home" or "Don't say anything." If you apologize to your animal, it will return to your farm. If you leave it alone, it will eventually return on its own after a few days.
When an animal is sick you'll see a skull icon floating above its head. This illness can be cured by using Animal Medicine, which you can buy from Otmar's General Store for 500 G. Then equip the medicine as a tool and use it on your sick animal. If you don't cure your animal's sickness within a reasonable amount of time, it will succumb to the illness and die. The smaller and more sensitive the animal, the less time you have to heal it: 3 days for Silkie and Araucana, 4 days for Chickens, 5 days for alpaca and Suffolk, 6 days for rabbits and Sheep, 7 days for Jersey and Angora Goat, 8 days for Cow, 9 days for Zebu and Llama, and 10 days for Camel.
You cannot collect products from your animals while they are sick or runaway.
Animal Personality Traits
Each of your animals will have a randomly assigned personality trait. You won't know what this trait is before you obtain the animal. An animal's personality will trigger a bonus once the animal reaches a specific friendship heart level based on the type of animal it is. It also has an impact on increasing friendship. The available personalities are Active, Cowardly, and Level-Headed.
For the bonus effect, it will trigger at specific levels of friendship based on the actual benefit the personality brings. You can either 1) have a 10% chance of obtaining more goods when collecting the animal's products once it reaches 5 hearts, 2) have a 5% chance of collecting an animal product with a .5 bonus to its Star Rank once the animal reaches 6 heart, or 3) have a 5% chance of collecting a plus-quality good once it reaches 7 hearts.
Active Animals
- More goods = Alpaca, Brown Alpaca, Llama, Sheep, Suffolk, and Zebu
- .5 Star Rank = Araucana, Angora Rabbit, Chicken, Gray Angora Rabbit, and Silkie
- Plus goods = Angora Goat, Camel, Cow, and Jersey
Cowardly Animals
- More goods = Araucana, Angora Goat, Angora Rabbit, Chicken, Gray Angora Rabbit, and Silkie
- .5 Star Rank = Camel, Cow, Jersey, Llama, and Zebu
- Plus goods = Alpaca, Brown Alpaca, Sheep, and Suffolk
Level-Headed Animals
- More goods = Camel, Cow, and Jersey
- .5 Star Rank = Alpaca, Angora Goat, Brown Alpaca, Sheep, and Suffolk
- Plus goods = Araucana, Angora Rabbit, Chicken, Gray Angora Rabbit, Llama, Silkie, and Zebu
For example, if you want a Sheep that has a chance of producing plus-quality goods without taking the necessary Safari trips to force it, then you'll want to have a Sheep with a Cowardly personality. Once your Cowardly Sheep has 7 or more friendship hearts, you have a 5% chance of collecting Wool+ when you sheer its coat.
An animal's personality may also make it easier for you to raise its friendship. An animal with an Active personality likes to graze outside, either on your farm or in the Safari, giving it a slight boost to its friendship points. An animal with a Cowardly personality likes to be brushed or have it products harvested. An animal with a Level-Headed personality likes to be talked to or have the Handbell chimed at it.
Increasing Productivity
One of the animal statistics is the number of By-Products the animal can produce at each harvest. An animal will make between 1 and 5 of an item. You can increase the number of products by feeding snack treats to the animals; just take the treat from your bag and give it to the animal as though you were giving a gift. These treats can be purchased from Cabin Country.
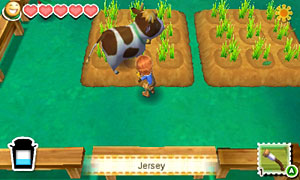
You can see your productivity progress by looking at the Snacks bar on each animal's Notebook profile page. The farther it is to the right side, the closer it is to reaching the maximum 5 products per harvest. You can feed your animal regular Treats or their animal-specific ones. Regular Treats are less expensive but also increase the Snacks bar only a little bit. The animal-specific treats cost more but increase the bar at a faster pace.
If you are just using the animal-specific treats, you are going to need the following number of treats per animal to raise the By-Products value to its maximum level:
- Alpaca: 142 Baa-Baa Treats
- Angora Goat: 154 Baa-Baa Treats
- Angora Rabbit: 111 Flipsy-Flopsy Treats
- Araucana: 130 Cluck-Cluck Treats
- Brown Alpaca: 142 Baa-Baa Treats
- Camel: 182 Baa-Baa Treats
- Chicken: 119 Cluck-Click Treats
- Cow: 106 Moo-Moo Treats
- Gray Angora Rabbit: 111 Flipsy-Flopsy Treats
- Jersey: 114 Moo-Moo Treats
- Llama: 162 Baa-Baa Treats
- Sheep: 119 Baa-Baa Treats
- Silkie: 122 Cluck-Cluck Treats
- Suffolk: 122 Baa-Baa Treats
- Zebu: 202 Moo-Moo Treats
That's not to say you can't give an animal-specific treat to an animal that won't want it, but in doing so you'll take a small negative friendship point hit as well as only increasing the Snacks meter by half of what you would have earned if you had simply given a basic Treat. It isn't advised, but you can give the wrong treat if you're really desperate.
Plus Quality Goods
Many of the recipe you might want to make will require plus-quality goods. These are marked with a plus "+" symbol in the item's names. For blueprints and maker machine recipes, you cannot replace plus-quality goods with normal quality. With cooked recipes, you can use normal or plus quality.
To make an animal permanently produce these higher quality goods instead of normal quality items, regardless of the animal's personality type, you will need to take it to the Safari park to graze. Talk to Veronica at the Guild Hall to request Agate take you and your selected farm animals to the Safari. You can take a maximum of 16 animals per trip, and each animal will cost 100 G.
Each full hour the adult animals spend grazing in the Safari will earn them 10 grazing points. A baby animal will only earn 5 grazing points per full hour. Once you have earned a total of 1000 grazing points, approximately 100 in-game hours for adults, the animal will produce plus-quality goods the next time you harvest from it.
While your animals are relaxing in the Safari, you must remain in the Safari with them. If you leave the Safari, your animals will return home to their barns.
Once an animal begins to permanently produce plus-quality goods, it will not revert back to producing normal quality.